
Hack Squat Form: How to Use the Machine Safely, Step by Step
On this page8
- 01What the hack squat is and who it’s for
- 02Setup: back, shoulders, and foot placement
- 03How to brace and unlock the sled
- 04The descent: depth and a controlled tempo
- 05Knee tracking and the drive back up
- 06Hack squat vs barbell squat: when to pick each
- 07Common hack squat mistakes
- 08Warm-up and how to progress
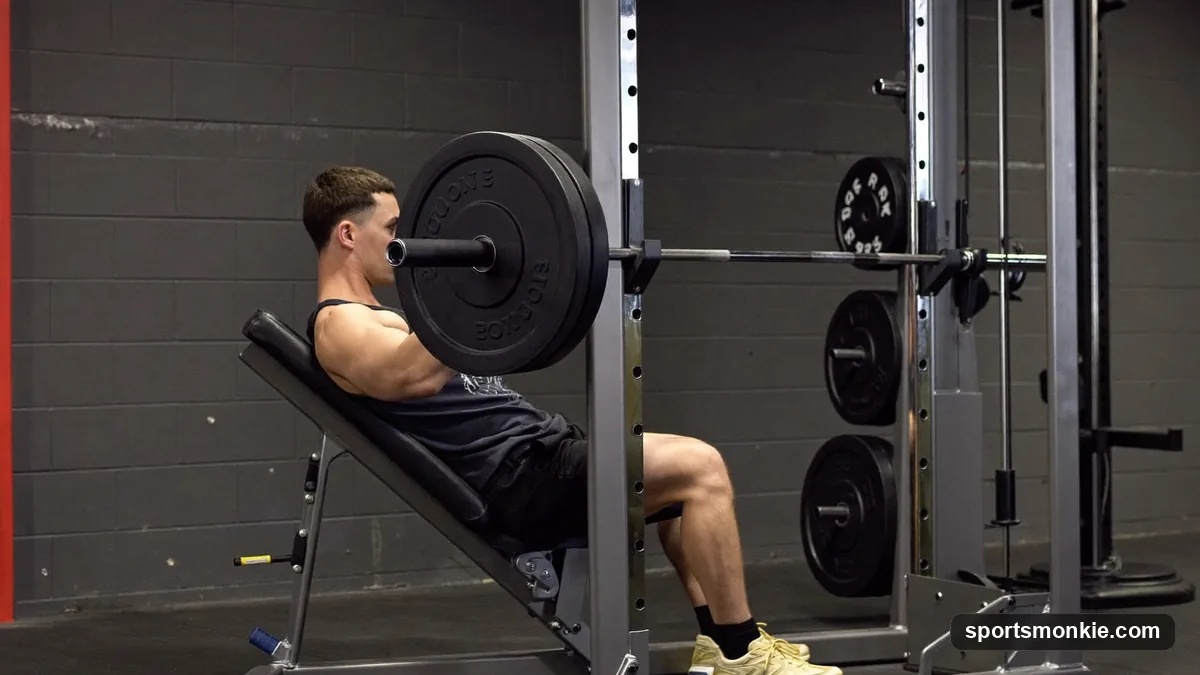
Proper hack squat form means pressing your back and shoulders flat against the machine’s pads, setting your feet about shoulder-width in the middle of the platform with toes turned out slightly, bracing your trunk, then lowering under control until your thighs reach at least parallel while your knees track over your toes. You drive back up through your whole foot to a soft lockout. The machine fixes your torso and guides the path, so the hack squat isolates your quads with far less demand on balance and lower-back stability than a free-weight squat. Below are the exact cues, depth targets, foot-placement options, and the mistakes that cause most knee complaints.
What the hack squat is and who it’s for
The hack squat is a machine leg exercise where you stand on an angled platform with your back braced against a padded sled that slides on rails. Because the sled controls the bar path, you can load the quads heavily without balancing a barbell or worrying about tipping forward. That makes it a strong pick for training legs alone, for adding volume after your main lift, and for lifters whose lower backs are cooked from heavy deadlifting.
It is not a replacement for the free-weight squat so much as a partner to it. If you are still learning the underlying movement, groove the basic pattern first with proper squat form, then use the machine to pile on quad-focused sets. The hack squat also slots naturally into the broader progressions in our proper lifting form guide, which covers how machine and free-weight work fit together in a program.
Setup: back, shoulders, and foot placement
Position your back flat against the back pad and tuck your shoulders firmly under the shoulder pads so the load sits on your traps and shoulders, not your neck. Your whole spine — from tailbone to upper back — should be in contact with the pad before you move. This is the single detail that keeps the hack squat safe: the pad does the stabilizing your lower back would otherwise fight for.
Now set your feet. A neutral position — about shoulder-width, mid-platform, toes turned out 10 to 20 degrees — splits the work between quads and glutes and is where beginners should start. Sliding your feet higher on the platform opens the hips more and shifts emphasis toward the glutes and hamstrings; dropping them lower emphasizes the quads hard but pushes the knees further forward and raises knee stress. Pick the position for the muscle you want, but keep your heels flat on the platform in every version.
How to brace and unlock the sled
Before you unlock anything, take a big breath into your belly and tighten your trunk as if bracing for a punch. That intra-abdominal pressure supports your spine even with the pad behind you, and it is the same brace you’d use on any loaded lift, from the proper deadlift form to the overhead press form. Hold it through the rep.
With the brace set, press up slightly to take the weight off the safety catches, rotate the handles to unlock the sled, and take control of the load. Always know where the safety handles are before your first working set — if a rep stalls, you rotate the handles back and the sled parks on the catches, no spotter needed. That built-in safety is a big reason the machine suits solo training.
The descent: depth and a controlled tempo
Lower the sled by bending your hips and knees together, letting the platform travel down in a smooth, controlled line rather than dropping into the bottom. Aim for a tempo of roughly two seconds down; the machine makes it tempting to bounce, and bouncing out of the bottom is where knees and lower backs get hurt.
Go until your thighs reach at least parallel to the platform — hip crease level with the top of the knee — and deeper if your heels stay planted and your lower back stays glued to the pad. The moment your pelvis tucks under (the “butt wink” you also fight in a barbell squat) or your heels start to lift, you’ve hit the end of your usable range; shorten the depth rather than forcing it. Full, honest depth beats a heavier sled you only quarter-rep.
Knee tracking and the drive back up
Through the whole rep, your knees should track in the same direction as your toes — pushed out slightly, never caving inward. Knee cave under load is the fault most likely to nag a joint, so actively spread the knees and screw your feet into the platform to hold an arch. Knees traveling past the toes is normal and fine on the hack squat; what you’re guarding against is them collapsing in or the weight rolling to the inside of the foot.
Out of the bottom, drive through your whole foot — heel, base of the big toe, base of the little toe — and think about pushing the platform away rather than lifting the weight. Rise until your knees are almost straight but not locked hard; keeping a soft knee at the top holds tension on the quads and protects the joint. Reset your brace at the top of each rep.
Hack squat vs barbell squat: when to pick each
The core difference is stability. The barbell back squat makes you balance and stabilize the load with your whole body, recruiting more total muscle and training real-world strength; the hack squat outsources that stabilizing to the machine so you can push the quads to failure more safely. One trains the skill of squatting, the other maximizes quad tension with less risk.
| Factor | Machine hack squat | Barbell back squat |
|---|---|---|
| Primary target | Quads (torso fixed) | Quads, glutes, whole posterior chain |
| Lower-back demand | Low — pad supports the spine | High — trunk stabilizes the load |
| Balance/skill needed | Minimal, guided path | High, free bar path |
| Training alone | Safe — safety catches | Needs spotter or safety pins |
| Best use | Volume, quad isolation, back-friendly days | Main strength driver, full-body |
Most lifters get the best of both by squatting with a barbell as their main lift and using the hack squat for extra quad volume. For a quad-focused free-weight alternative, the front squat form trains a similar upright, quad-dominant pattern, while the goblet squat form is the easiest way to teach the depth and knee-tracking that carry straight over to the machine. On posterior-chain days, pair it with the romanian deadlift form so your hamstrings and glutes aren’t left behind.
Common hack squat mistakes
Feet set too low. This is the top cause of knee ache. Dropping the feet down the platform drives the knees far past the toes under heavy load. Move the feet up and forward until the knees feel supported.
Heels lifting at the bottom. If your heels rise, you’ve gone deeper than your ankle mobility allows and are dumping load onto the knees. Cut the depth or work on ankle mobility over time.
Rounding off the pad. Letting your lower back peel away from the pad at the bottom removes the machine’s main safety benefit. Brace harder and stop the rep where your spine stays in contact.
Bouncing and half-repping. Slamming out of the bottom or loading a sled so heavy you only cut a quarter of the range trades form for ego. Control the descent and hit real depth.
Locking the knees hard at the top. Snapping into a rigid lockout under load stresses the joint. Finish with knees almost straight and tension still on the quads.
Warm-up and how to progress
Never load a cold hack squat. Spend 5 to 10 minutes on light cardio and dynamic mobility — leg swings, bodyweight squats, ankle rocks — then do a warm-up set or two with light plates to groove the path before your working weight. Because the machine is stable, it’s easy to add load faster here than on a barbell, so let clean depth and knee tracking gate every jump, not the number on the sled.
Build the quads with 3 to 4 sets of 8 to 15 controlled reps, adding a small amount of weight only when a session feels smooth through full depth. Rotate your foot placement over a training block — a few weeks neutral, a few weeks higher for glute bias — to train the legs from more than one angle, and balance all that pressing volume with pulling work like the pattern in how to do a pull up so your program stays even. This is general fitness information, not medical advice; if you’re returning from injury, have a knee or back issue, or feel a sharp pinch during the lift, stop and consult a qualified coach or clinician before loading up.
Frequently asked questions
Where should your feet go on a hack squat?+
Set your feet about shoulder-width in the middle of the platform with toes turned out 10 to 20 degrees. That neutral spot splits the work between quads and glutes. Placing the feet higher shifts emphasis toward the glutes and hamstrings, while a lower position hammers the quads but stresses the knees more, so start neutral and adjust.
How low should you go on a hack squat?+
Lower until your thighs are at least parallel to the platform, meaning the hip crease drops level with the top of the knee. Deeper is fine if your lower back stays flat against the pad and your heels stay down. Stop shortening the range only when your pelvis starts to tuck or your heels lift, which means you have run out of usable depth.
Is the hack squat better than the barbell squat?+
Neither is strictly better; they do different jobs. The hack squat fixes your torso against a pad, so it isolates the quads with less demand on balance and lower-back stability, making it great for volume and for training alone safely. The barbell back squat recruits more total muscle and trains real-world stability, so most lifters benefit from doing both.
Why do my knees hurt on the hack squat?+
Knee pain usually comes from feet set too low on the platform, letting the knees drift far past the toes under load, or from bouncing out of the bottom. Move your feet higher and more forward, control the descent, and keep the knees tracking in line with the toes rather than caving in. If pain persists, stop and see a clinician.
Does the hack squat build glutes or quads?+
The hack squat is primarily a quad builder because the fixed torso and forward-angled path load the front of the thighs. You can bias the glutes by setting your feet higher and further forward on the platform and driving to a deeper hip bend, but for direct glute work most lifters add hip thrusts or Romanian deadlifts alongside it.
Can beginners do the hack squat?+
Yes. Because the machine supports your back and guides the bar path, the hack squat is often easier for beginners to learn than a free barbell squat. Start with light plates or none, learn the depth and knee-tracking cues, and always find the safety handles before your first working set so you can rack the sled if a rep stalls.
Sources
Play & tools
Free browser games and tools — no account, no download.
- Play today's Sports Connections — Today's Sports Connections — daily hints, answers, and play the grid.
- Play Guess the NFL Player — A new mystery NFL player every day. Eight guesses, with a clue on each — plus free unlimited mode.
- Explore all our games →
Related guides
Proper Squat Form: How to Back Squat Safely, Step by Step
Proper squat form means a braced trunk, hips and knees bending together, knees tracking over the toes, and thighs breaking parallel — here is the setup, the cues, and the fixes for butt wink and knee cave.
Bulgarian Split Squat Form: How to Do It Right
Proper Bulgarian split squat form starts with a stance long enough that your front shin stays near vertical, a slight forward torso lean, and the knee tracking over the toes. Here is the step-by-step technique, cues, and common mistakes.
Front Squat Form: Elbows High, Torso Tall, Full Depth
Front squat form starts with a solid front rack, elbows driven high, an upright torso, and a controlled descent to at least parallel. Here are the exact cues, mobility checks, and mistakes to fix.
Goblet Squat Form: How to Do It Right (Cues, Depth, Mistakes)
Correct goblet squat form means holding a dumbbell or kettlebell at chest height, sitting straight down between your hips with an upright torso, dropping to at least parallel, and driving your elbows inside your knees at the bottom.
Overhead Press Form: Grip, Bar Path, and Lockout, Step by Step
Overhead press form comes down to a stacked bar path: grip just outside the shoulders, brace hard, move your head back so the bar travels straight up past your face, then finish with the bar over the mid-foot.
Proper Bench Press Form: A Step-by-Step Guide to a Safe, Stronger Press
Proper bench press form starts with a shoulder-width-plus grip, retracted shoulder blades, a slight arch, and a bar path that touches the lower chest. Here is how to set up, press, and avoid the mistakes that stall your bench and hurt your shoulders.