
Free Throw Technique: A Repeatable Pre-Shot Routine
On this page7
A great free throw is won before the ball ever leaves your hand. Because you shoot from a fixed 15-foot line with no defender and no clock pressure on the shot itself, free throw technique is about eliminating variables so your body repeats one grooved motion. Nail your alignment, run the same pre-shot routine every time, breathe to calm your nerves, and finish clean.
That is the whole game. Below is exactly how to build each piece, the way college and pro shooters do it. Free throws are the most trainable points in basketball, and unlike your live-game shooting form, you get all the time you need to set up perfectly.
Start With Alignment: Find the Nail
Every trip to the line starts with your feet. Most rims have a small nail or center mark where the hoop attaches to the backboard hardware, directly in line with the middle of the basket. Line the tip of your pivot foot (right foot for right-handed shooters) so it points at that center nail. This automatically squares your shooting shoulder, elbow, and hand to the middle of the rim.
Your stance should be:
- Feet about shoulder-width apart, weight balanced over the balls of your feet.
- Pivot foot slightly ahead, toe on the nail; guide foot a few inches back and open.
- Hips and shoulders square to the rim, not rotated.
Because you set up the same spot 15 feet from the backboard every time, alignment is the one variable you can make perfect on every attempt. Get this right and your misses become straight short or straight long, which are far easier to fix than left-right scatter.
Build a Pre-Shot Routine You Can Repeat
The pre-shot routine is the heartbeat of free throw technique. Its only job is to make every attempt feel identical, so pressure cannot change your mechanics. Steph Curry, Ray Allen, and nearly every elite shooter runs the exact same sequence for years.
A reliable template:
| Step | Action | Purpose |
|---|---|---|
| 1 | Set pivot foot on the nail | Squares your body |
| 2 | Take 1-3 dribbles (same count always) | Triggers rhythm and focus |
| 3 | Spin ball to seams, set grip | Consistent hand placement |
| 4 | One deep breath, exhale slow | Lowers heart rate |
| 5 | Eyes lock on target | Narrows focus |
| 6 | Shoot in one motion | Executes the grooved shot |
The specific steps matter far less than the sameness. Pick a routine, time it (most take four to seven seconds), and run it identically in every practice rep so it holds up in a packed gym. If you want a deeper primer on grooving repeatable mechanics, our guide on how to shoot a basketball breaks down the full shooting motion from the ground up.
Set Your Grip and Ball Position
Consistent hand placement is the difference between soft makes and hard rim-outs. Spread your shooting hand so the ball rests on your fingerpads and the middle of your palm stays slightly off the ball. Your index and middle fingers should straddle the ball’s center, often lined up with the seams so you get the same feel every time.
Key checkpoints:
- Guide hand on the side, thumb relaxed, purely a balance hand that does not push.
- Shooting elbow tucked under the ball, roughly forming an L, pointed at the rim.
- Ball starting position at your shooting-side hip or in a set point near your forehead, whichever your routine uses each time.
The guide hand is where most misses hide. If your off-hand thumb flicks the ball, you get side spin and left-right misses. Keep it passive. These grip fundamentals carry straight over to your jump shot technique, so cleaning them up at the line pays off everywhere on the floor.
Breathe to Control Your Nerves
Here is the piece amateurs skip and pros never do: the breath. Under pressure your heart rate spikes, your hands tense, and your fine motor control degrades. A single slow, deliberate breath is the fastest way to reset your nervous system in the four seconds you have at the line.
Do this: after you set your feet and dribble, take one deep breath in through the nose, then exhale slowly through the mouth. The long exhale activates your parasympathetic nervous system and drops your arousal level. Make this breath a fixed part of your routine so it fires automatically in a tie game with the crowd roaring.
Then narrow your eyes to a single target: the front of the rim, the little gap just over the front rim, or the back of the iron. Choose one focal point and never switch. Locking your eyes quiets mental noise and keeps your release traveling straight toward center.
Execute Clean Mechanics From the Ground Up
With alignment, routine, grip, and breath in place, the shot itself should feel almost boring. Free throw mechanics flow bottom to top in one connected motion:
- Legs load and drive. Use a modest knee bend, about 15 to 30 degrees. The legs supply the soft energy, not your arm.
- Ball rises straight up your midline to the set point. No dip and swing.
- Elbow extends as the legs finish, keeping the ball on a straight vertical plane.
- Release high and soft, with the ball rolling off your index and middle fingers.
- Snap the wrist into a full gooseneck follow-through, fingers pointing at the floor.
- Hold the finish until the ball reaches the rim.
Aim for an arc that peaks a few feet above the rim; a higher, softer arc gives the ball a bigger effective target and more forgiving bounces. Backspin should be smooth and even. If your ball wobbles, check your guide hand and your finger release.
Because there is no defender, resist the urge to rush. Let the legs and arm fire in the same rhythm every time. If your makes tend to fall short late in games, it is almost always tired legs plus a rushed motion, which is why building free throw endurance into your shooting drills matters so much.
Practice Under Fatigue and Track Your Reps
You do not rise to the occasion at the line; you fall to your level of practice. To make your technique bulletproof:
- Shoot free throws tired. Sprint a suicide, then step to the line. Game free throws almost always come after exertion.
- Track makes in sets. Shoot in blocks of 10 or 25 and log your percentage so you see real progress, not vibes.
- Add pressure. Set a make-or-run consequence, or shoot “swish or miss” where a rim-bounce counts as a miss.
- Never break routine. Run your full pre-shot sequence on every single practice rep, or it will not hold in a game.
Even simple ball control work like basketball dribbling drills builds the calm, in-control hands that carry to the line, and the same discipline that sharpens your layup finishing applies here: master the fundamentals slowly, then repeat them until they are automatic.
The Bottom Line
Free throw technique is not about talent or strength. It is about sameness. Align your pivot foot to the nail, run one identical pre-shot routine, take a slow breath to settle your nerves, then shoot with clean bottom-to-top mechanics and a held follow-through. Groove that sequence in tired, pressured practice and your percentage will climb, because the shot that already asks the least of your body simply rewards whoever repeats it best. For the complete shooting picture, keep working through the full how to shoot a basketball system and let those reps compound.
Frequently asked questions
How far is the free throw line from the basket?+
The free throw line sits 15 feet from the backboard, which works out to roughly 13 feet 9 inches from the front of the rim, at every level from high school through the NBA. That distance never changes, which is exactly why the shot rewards a repeatable routine. Because the range and the rim height (10 feet) are fixed, you can groove one identical motion and trust it every single attempt without adjusting for distance.
What is the ideal free throw routine?+
The best free throw routine is short, identical, and yours. A common version: step to the line and set your pivot foot on the nail, take the same number of dribbles (usually one to three), spin the ball to find the seams, take one deep breath, fix your eyes on a single target, then shoot in one motion. The exact steps matter less than doing the same steps at the same tempo every time, in practice and in games.
Where should I aim on a free throw?+
Pick one small, specific target and stare at it until the ball leaves your hand. Most shooters aim just over the front of the rim or at the small gap between the front rim and the middle of the hoop. Some prefer the back of the rim. Choose one and never change it. A narrow focal point quiets your mind, steadies your eyes, and keeps your release aligned toward the center of the basket.
Why do I make free throws in practice but miss in games?+
Game misses are usually caused by an elevated heart rate and a rushed or altered routine, not broken mechanics. Under pressure players skip their breath, speed up their tempo, and grip the ball tighter. The fix is to practice free throws when tired and to anchor your routine so it runs the same at 120 beats per minute as at rest. One slow exhale before the shot lowers arousal and restores your normal rhythm.
How much should I bend my knees on a free throw?+
Use a comfortable, athletic knee bend, roughly 15 to 30 degrees, enough to generate soft energy from the legs without turning the shot into a heave. The free throw is not a distance shot, so most of your control comes from a smooth upward drive through the legs into the release. Bend the same amount every time; inconsistent leg power is a top cause of shots that come up short or long.
What is the correct follow-through on a free throw?+
Finish with your shooting arm fully extended toward the rim, wrist snapped down so your fingers point at the floor in the classic gooseneck. Hold that follow-through until the ball hits the rim or net. The ball should roll off your index and middle fingers with backspin. A held, relaxed follow-through confirms your release was straight and keeps you from short-arming the shot when nerves creep in.
Sources
Play & tools
Free browser games and tools — no account, no download.
- Play 82-0 — Draft five, one per position, and see if your lineup can go a flawless NBA season.
- Play Era Ball — Draft an all-time NBA roster from a single era, then simulate a season and chase a perfect run.
- Play 32-0 — Draft five college basketball legends, one per position, and chase a perfect 32-0 national title.
- Explore all our games →
- Get the printable bracket — Download and print a blank tournament bracket to fill out by hand.
- Open the TS% calculator — Calculate TS% from points, field goal attempts and free throw attempts — scoring efficiency in one number.
- Explore all our free sports tools →
Related basketball guides
View all →
Jump Shot Technique: Elevation, Set Point, Release
Master jump shot technique with real coaching cues for footwork, set point, elevation, and releasing at the peak—for both catch-and-shoot and off-the-dribble shots.

How to Hit a Bunker Shot: The Splash Technique That Escapes Every Time
To hit a greenside bunker shot, open the clubface, aim two inches behind the ball, keep your weight forward, and splash the sand while accelerating through to a full finish. Here is the step-by-step method.
Bank Shot in Basketball: Technique, Geometry, and Why It Works
A bank shot in basketball is a shot deliberately banked off the backboard into the hoop. Learn the aim points, angles, and players who mastered it.
Hook Shot in Basketball: Technique, Skyhook, and Why It's Unblockable
The hook shot in basketball is a one-handed shot released in a sweeping arc with the shooter's body shielding the ball from the defender.
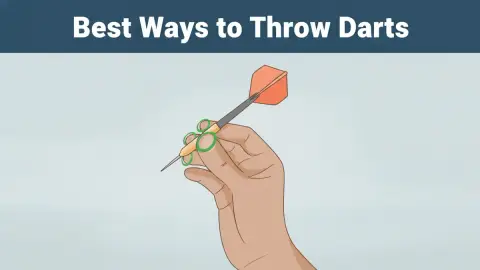
Best Ways to Throw Darts: A Complete Technique Guide
The best way to throw darts blends a stable grip, steady stance, and smooth follow-through. Master these three basics to boost accuracy at any distance.
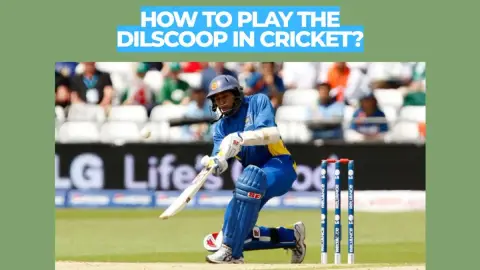
How to Play the Dilscoop in Cricket: Step-by-Step Technique
The Dilscoop scoops a full pace delivery over the keeper's head for six. Learn the exact footwork, bat angle, and timing that make this shot work.