
How to Measure Your Vertical Jump (5 Accurate Methods)
On this page8
- 01Standing reach vs jump reach: the number that matters
- 02Method 1: The wall-and-chalk test (best free method)
- 03Method 2: Jump-and-touch on a marked wall or Vertec
- 04Method 3: Jump mat (contact/flight-time method)
- 05Method 4: Smartphone apps and slow-motion video
- 06Method 5: Standing vs approach (running) vertical
- 07Common measuring mistakes that inflate your number
- 08How to test consistently for real progress
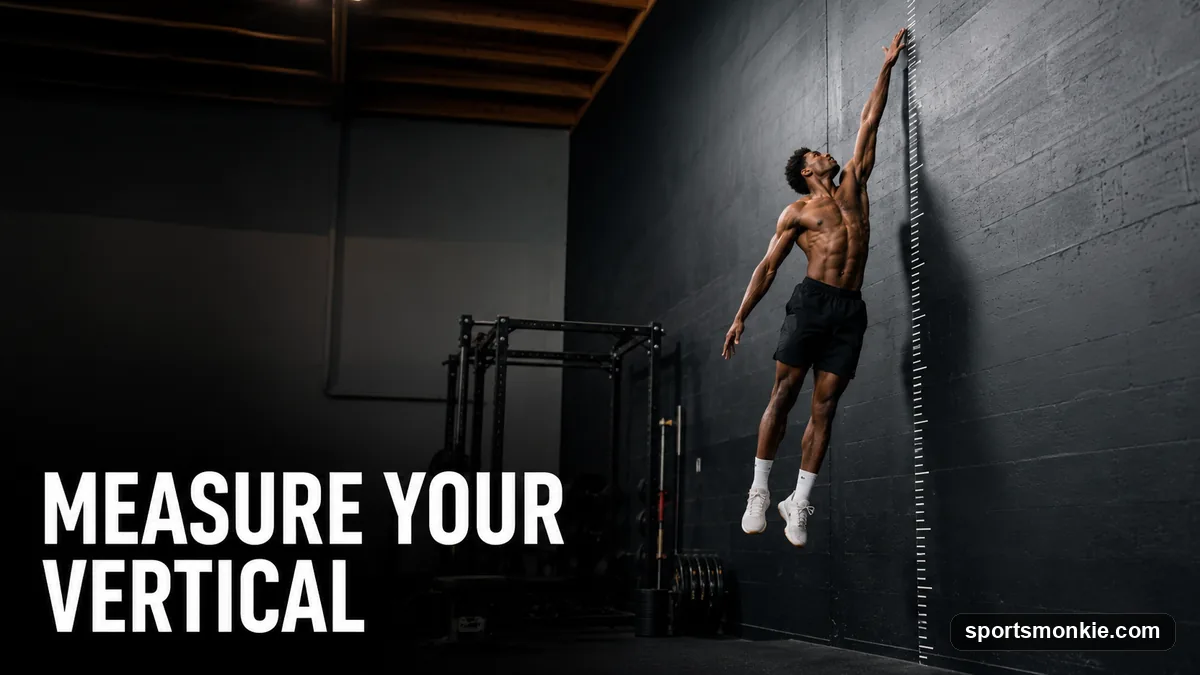
To measure your vertical jump, subtract your standing reach from your jump reach. Record the highest point you can touch flat-footed with one arm extended, then jump and touch the highest point you can reach — the gap between the two is your vertical. Most people who “measure” their jump skip the standing-reach step and end up with a number that’s inflated by their own height and arm length.
Below are five accurate methods, from a free chalk mark on a garage wall to a gym Vertec, plus the setup mistakes that quietly add inches you didn’t jump, and how to test consistently so your numbers actually mean something month to month.
Standing reach vs jump reach: the number that matters
Your vertical jump is jump reach minus standing reach, and getting the standing reach right is where most tests go wrong. Standing reach is the highest point you can touch with your feet flat on the floor, one arm stretched straight overhead, shoulder pushed up as far as it goes. A 6-foot player and a 5-foot-8 player can have the exact same 24-inch vertical while touching wildly different heights, because vertical measures how far off the ground you got, not how high you reached.
Never estimate standing reach from your height — measure it directly every time. Even a two-inch error in standing reach becomes a two-inch error in your recorded vertical, which is enough to make a real training gain vanish or a plateau look like progress. This is the same principle behind the progress testing in our guide on how to jump higher, where consistent measurement is what separates real gains from noise.
Method 1: The wall-and-chalk test (best free method)
The wall-and-chalk test is the most accurate no-equipment method and needs only a tall wall and something to mark with. Rub chalk (or a bit of water) on the fingertips of your reaching hand. Stand side-on to the wall, feet flat, and press your fingertips as high as they’ll go to leave your standing-reach mark. Then, from a standstill, dip and jump, slapping the wall at the peak to leave a second mark.
Measure the vertical distance between the two chalk marks with a tape measure — that’s your vertical jump. Use a wall you don’t mind marking (a garage, gym, or outdoor brick wall), and take three attempts, keeping the best. The only real limitation is ceiling height and reach accuracy at the top of the jump.
Method 2: Jump-and-touch on a marked wall or Vertec
A Vertec is the gold-standard gym tool: a pole with a stack of horizontal plastic vanes you swat aside at the top of your jump. You set your standing reach by swinging the vanes to your flat-footed reach height, then jump and knock away the highest vane you can touch. The device reads the height directly, so there’s no chalk to measure and results are repeatable to a fraction of an inch.
If you don’t have a Vertec, replicate it by taping a measuring tape or marked strips up a wall at known heights and noting the highest one you touch. The Vertec’s advantage is speed and consistency across many athletes, which is why combines and team testing use it. The tradeoff is cost and the need to calibrate standing reach carefully each time.
Method 3: Jump mat (contact/flight-time method)
A jump mat measures flight time — how long you’re in the air — and converts it to jump height with physics, so it never touches your reach at all. You step on the pressure-sensitive mat, jump straight up, and land back on it; the connected timer or app calculates height from how long your feet left the surface. It’s fast, needs no wall, and removes reach-accuracy error entirely.
The catch: flight-time methods assume you take off and land in the same posture. Tucking your knees or landing bent-legged lengthens hang time and reads as a higher jump than you actually made. Keep your legs relatively straight in the air and land in roughly your takeoff position for an honest number. Jump mats are common in performance labs and worth it if you test often.
Method 4: Smartphone apps and slow-motion video
Phone apps estimate vertical from flight time using your camera’s high-frame-rate video, and they’re surprisingly usable if you follow the same rules as a jump mat. Film yourself jumping from the side, keep your legs straight, and land where you took off. The app counts the airborne frames and calculates height. Expect accuracy within an inch or two — good enough to track a training trend, if not to settle a bet.
You can also do this manually: film a jump-and-touch against a marked wall in slow motion and read the peak frame. That combines video precision with the touch-based method, sidestepping the knee-tuck error that fools pure flight-time apps. Either way, use the same phone, angle, and distance each session so the numbers stay comparable.
Method 5: Standing vs approach (running) vertical
Decide up front whether you’re testing your standing vertical or your approach vertical, because they measure different things and you can’t compare one to the other. Standing (no-step) vertical is jumped from a dead standstill and is the purest test of leg power. Approach vertical uses a one-to-three-step run-up, converting forward momentum into extra height — typically 2 to 6 inches more than your standing number.
Basketball and volleyball players care most about approach vertical because that’s how they actually jump in a game, while strength coaches often track standing vertical to isolate raw power gains. Test whichever matches your goal, label it clearly, and always compare standing to standing and approach to approach. If dunking is the goal, our guide on how to dunk a basketball explains how much approach vertical you actually need for your reach and rim height.
Common measuring mistakes that inflate your number
Small setup errors add fake inches faster than any training program adds real ones. Watch for these:
- Skipping or lowballing standing reach. The single biggest error. Measure it flat-footed with a fully extended arm and pushed-up shoulder, every session.
- Bending or tucking your knees mid-air on a flight-time test or app, which stretches hang time and reads too high.
- Taking a step on a “standing” test, which quietly turns it into an approach jump and adds inches you didn’t earn.
- Measuring on a springy surface like a mat or grass, which changes ground contact versus a hard floor.
- Testing tired. Jump height drops after leg training, so a fatigued test undercounts you and a fresh one after rest overcounts trends.
Fixing these matters more than any single tool. A precise Vertec reading built on a sloppy standing reach is still wrong.
How to test consistently for real progress
Consistency beats precision when you’re tracking gains over time. Lock in the same conditions every test: same time of day, same shoes, same surface, the same warm-up, and the same method (standing or approach). Do a proper warm-up of light cardio and a few submaximal jumps, then take three to five maximal attempts with full rest between them and record the best, not the average.
Test every four weeks, not weekly — day-to-day fatigue and sleep can swing results by an inch, so frequent testing measures noise instead of adaptation. Between tests, the actual work is what moves the number: the strength base and explosive drills in plyometric exercises for vertical jump, the loaded lifts in vertical jump strength training, and structured landing and takeoff practice from a box jump workout. Measure honestly, train consistently, and let a month of work — not a single lucky jump — tell you whether it’s working.
Frequently asked questions
What is the correct way to measure a vertical jump?+
Measure standing reach first: stand flat-footed, extend one arm straight up, and mark the highest point your fingertips touch. Then jump and mark or touch the highest point you can reach. Subtract standing reach from jump reach. That difference is your true vertical jump. Skipping the standing-reach step and just measuring how high you touch is the most common error.
What is a good vertical jump for my age?+
For untrained adult men, roughly 16 to 20 inches is average and above 24 inches is good; trained athletes often reach 28 inches or more. Untrained women average around 12 to 16 inches. Teenagers vary widely with growth. Elite basketball and volleyball players commonly test in the 30-to-40-inch range, which takes years of dedicated training.
How do I measure my vertical jump at home without equipment?+
Use the wall-and-chalk method. Rub chalk on your fingertips, stand side-on to a wall and mark your standing reach flat-footed, then jump from a standstill and slap the wall at the top. Measure the gap between the two chalk marks with a tape. A wall next to a driveway or garage works, and it costs nothing.
Should I measure standing vertical or approach vertical?+
Measure both if your sport uses a running start. Standing (no-step) vertical is jumped from a standstill and is the cleaner test of pure power. Approach vertical uses a one-to-three-step run-up and is usually 2 to 6 inches higher because you convert horizontal momentum into height. Always label which one you tested so future numbers compare fairly.
Are vertical jump measuring apps accurate?+
Flight-time apps like those that film your jump at high frame rate can be reasonably accurate, usually within an inch or two, if you land in the same spot you took off from and keep your legs straight in the air. Tucking your knees fools the app into reading a higher jump, since it estimates height from hang time, not from a touched point.
How high can the average person jump?+
The average untrained adult man jumps about 16 to 20 inches vertically, and the average untrained woman about 12 to 16 inches. Body weight, age, leg strength, and technique all affect the result. Most people can add 2 to 6 inches with a few months of structured strength and plyometric training, so the average is a starting point, not a ceiling.
How often should I test my vertical jump?+
Test every four weeks, not more. Day-to-day fatigue, sleep, and soreness can swing your result by an inch or more, so weekly testing measures noise rather than progress. Test under the same conditions each time: same time of day, same warm-up, same surface and shoes, and take the best of three fresh attempts.
Sources
Play & tools
Free browser games and tools — no account, no download.
- Play today's Sports Connections — Today's Sports Connections — daily hints, answers, and play the grid.
- Play Guess the NFL Player — A new mystery NFL player every day. Eight guesses, with a clue on each — plus free unlimited mode.
- Explore all our games →
Related guides
Vertical Jump Training Basics: How to Start (Beginner Guide)
Vertical jump training basics: build leg and hip strength, add plyometrics to turn that strength into speed, and train two to three days a week. Here is how to start from scratch and what to skip.

How to Increase Vertical for Basketball: A 12-Week Jump Program
To increase your vertical for basketball, combine heavy lower-body strength, explosive plyometrics, and hip mobility three days a week. Here is the exact program, cues, and mistakes to avoid.

How to Increase Your Vertical Leap (Add 4+ Inches)
To increase your vertical leap, train three things together: lower-body strength, plyometric power, and jump technique. This step-by-step plan adds 2 to 6 inches in 8 to 12 weeks.

How to Jump Higher for Volleyball: Approach, Plyo & Strength
To jump higher for volleyball, fix your approach mechanics first, then add twice-weekly plyometrics and heavy lower-body strength. Here is the exact approach-jump technique, drills, and 8-week plan.

How to Jump Higher: The Complete Vertical Jump Training Guide
How to jump higher comes down to three trainable factors: leg and hip strength, explosive power (plyometrics), and jump technique — trained together in a structured program over 6 to 12 weeks.

Jump Training for Women Over 50: A Safe, Low-Impact Plan
Jump training for women over 50 builds bone density and power safely when you start low-impact: begin with pogo hops and step-ups, master soft landings, then progress over 8 weeks. Here is the full plan.