
8 Golf Backswing Drills to Fix Your Takeaway and Turn (By Fault)

On this page14
- 01One-Piece Takeaway Drill
- 02Mirror Turn Drill
- 03Wall Drill
- 04Lead-Arm Connection Drill
- 05Lead-Wrist Flat Drill
- 06Alignment-Stick Plane Drill
- 07Chair (Trail-Hip Load) Drill
- 08Split-Hand Drill
- 09How We Ranked These Drills
- 10How to Diagnose Your Backswing Fault First
- 11Backswing Checkpoints to Hit Every Rep
- 12Why Drills Beat Just Hitting Range Balls
- 13Common Backswing Mistakes to Avoid
- 14A 3-Week Backswing Practice Plan
Drills are ranked by impact, not novelty: a drill scores higher when it fixes the root cause rather than a downstream symptom, cures more than one common miss, and changes ball flight the fastest for the average amateur. Foundational takeaway and turn work outranks single-fault fixes.
- Fixes the root
One-Piece Takeaway Drill
The first foot of the backswing sets the path, plane, and clubface for everything after it, which is why this ranks above every single-fault drill below: fix the takeaway and a slice, a reroute, and an over-swing often disappear at once. Keep the triangle formed by your arms and shoulders intact and move the club, hands, and chest away together until the shaft is parallel to the ground, with no independent wrist hinge yet.
A club laid across your chest, or a headcover pinched between your forearms, gives instant feedback the moment the hands take over early. Groove this before anything else, then feed it into the full sequence in how to swing a golf club.
Fixes: wristy, snatchy start · Feedback tool: headcover under forearms · Speed: quarter to half, no ball
- Power engine
Mirror Turn Drill
A complete shoulder turn is the backswing's actual power source, so it ranks above the sway and connection fixes: those protect a turn you have, this one builds the turn most amateurs never make. Stand face-on to a mirror, turn to the top with no club, and check that your lead shoulder rotates behind the ball and your back faces the target.
Amateurs routinely stall the turn early and lift the arms to fake length, which steepens the top and leaks speed. Hold the finished position two seconds per rep to build the feel; the coil, not arm-lift, is what our guide to how to increase golf swing speed turns into distance.
Fixes: short, incomplete shoulder turn · Reps: 12 daily, no club · Check: back to target, lead shoulder behind ball
- Stops the slide
Wall Drill
This ranks third because sway is the most common turn-killer: hips that slide away from the target instead of rotating flatten the coil the mirror drill builds and wreck low-point control. Set up with your trail hip two or three inches from a wall, then make a backswing without letting the hip touch it.
Contact means you are sliding rather than turning over a stable trail leg. Feel the trail glute load and the hips rotate in place. The same fix removes the lateral slide that causes fat and thin strikes, a theme also covered in golf swing technique.
Fixes: swaying, sliding trail hip · Prop: a wall · Feel: trail glute loads, hips rotate in place
- Keeps it tight
Lead-Arm Connection Drill
A flying lead arm lengthens the swing and throws the club off plane, so this outranks the finer path and face drills that follow: connection keeps the club in front of the body where those later checkpoints even make sense. Tuck a glove or small towel under your lead armpit and make slow backswings without letting it fall.
If it drops before the top, the lead arm is separating from the chest. Keeping it forces the torso to carry the arms back. Rebuild it at quarter speed for 10 reps before any full motion, then layer it into a rotation-based set of golf swing drills.
Fixes: flying, disconnected lead arm · Prop: towel or glove under armpit · Reps: 10 at quarter speed
- Squares the face
Lead-Wrist Flat Drill
This is the highest-ranked clubface drill because a cupped lead wrist at the top is a direct cause of the slice, the most common amateur miss. Swing to the top and pause, then check that your lead wrist is flat or slightly bowed, not cupped, with the clubface matching your lead-forearm angle.
Face control at the top starts in the hands, so fix a weak or strong hold first using how to grip a golf club; then this drill pairs naturally with how to stop slicing the golf ball.
Fixes: cupped wrist, open face at top · Check: flat or bowed lead wrist · Pairs with: grip fixes
- Plane check
Alignment-Stick Plane Drill
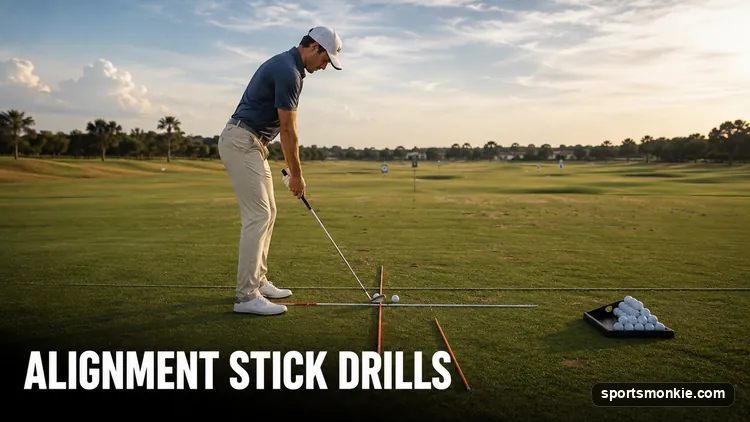
Plane ranks below face because an off-plane shaft is usually a symptom of the takeaway and connection faults above, not a separate disease; still, it earns a spot for the golfers whose start is clean but whose club crosses the line up top. Push an alignment stick into the ground on your target line, angled to match your shaft at address.
Make slow backswings and keep the clubshaft parallel to the stick halfway back and pointing down the line at the top. If it crosses or lays off, the reference makes it obvious. This is the backswing counterpart to the through-swing work in our golf swing path drills.
Fixes: off-plane, across-the-line shaft · Prop: alignment stick on target line · Check: shaft parallel halfway back
- Weight shift
Chair (Trail-Hip Load) Drill
A reverse pivot, weight hanging on the lead side at the top, is a real power leak, but it ranks here because the wall and turn drills already fix it for most players; this drill is the targeted cure when they do not. Place a chair or bag just outside your trail hip, make a backswing, and lightly press the outside of the hip into it.
Feel your weight load into the trail heel and glute rather than the lead foot. Rehearse the load 10 times, then hit a few soft shots keeping the same feel before moving to golf driving range practice drills.
Fixes: reverse pivot · Prop: chair outside trail hip · Load: 60-70% into trail heel
- Feel builder
Split-Hand Drill
This ranks last because it is a diagnostic feel drill rather than a fault-specific fix, but it is the fastest way to feel whether your body or your hands are running the backswing. Slide your trail hand a few inches down the grip so your hands are split apart, then make slow backswings.
The gap exaggerates any independent hand action, so you immediately sense flipping wrists versus a turning torso. Use it as a warm-up before the higher-ranked drills, alongside the beginner fundamentals in golf swing tips for beginners.
Fixes: overactive hands, poor sequencing · Setup: hands split on grip · Use: diagnostic warm-up
Reader interaction
Build your ranking
Drag the names into the order you think is right — or use the arrows — then submit to see how your list compares with everyone else's.
- One-Piece Takeaway Drill
- Mirror Turn Drill
- Wall Drill
- Lead-Arm Connection Drill
- Lead-Wrist Flat Drill
- Alignment-Stick Plane Drill
- Chair (Trail-Hip Load) Drill
- Split-Hand Drill
Audience ranking
How everyone ranked them
Built from reader rankings using position-based points.
The eight drills above are ranked by impact, but the right one for you depends on your fault. Diagnose first, drill one thing at a time, and keep the reps slow and mostly ball-free. The sections below explain how the ranking was built, how to find your fault on camera, and how to turn a few weeks of reps into a change that survives on the course.
How We Ranked These Drills
Impact, not novelty, sets the order. A drill scores higher when it does three things: fixes a root cause instead of a downstream symptom, cures more than one common miss, and changes ball flight fast for the average amateur. That is why the one-piece takeaway and mirror turn sit at the top — a clean start and a full coil remove faults that the plane and weight-shift drills only patch. Single-fault fixes and diagnostic feel drills rank lower even when they are genuinely useful. Your own order should start wherever the camera says your biggest leak is.
How to Diagnose Your Backswing Fault First
Film your backswing from two angles before you touch a ball: down-the-line (camera behind your hands, on the target line) and face-on. Down-the-line shows plane and takeaway path; face-on shows sway, turn, and arm structure. Match the fault to the drill instead of guessing.
| What you see on camera | Likely fault | Drill to run |
|---|---|---|
| Club snatched inside in the first foot | Wristy takeaway | One-Piece Takeaway |
| Back never faces the target; arms lift | Short shoulder turn | Mirror Turn |
| Trail hip slides past the setup line | Sway | Wall Drill |
| Ball curves hard right | Cupped lead wrist / open face | Lead-Wrist Flat |
| Weight on lead foot at the top | Reverse pivot | Chair (Trail-Hip Load) |
Pair the diagnosis with the fundamentals in golf swing technique so you are fixing a position, not chasing a ball-flight symptom.
Backswing Checkpoints to Hit Every Rep
Give every drill the same three checkpoints so you know it is working. Halfway back: the shaft is parallel to the ground and points down the target line, with the toe of the club up. Lead arm at the top: connected to the chest, not lifted. Weight: roughly 60 to 70 percent loaded into the trail heel, not slid outside the trail foot. Hit these three and the club almost has to arrive on plane.
Why Drills Beat Just Hitting Range Balls
Hitting bucket after bucket mostly grooves the pattern you already own, faults included, because a ball in front of you triggers the urge to hit rather than to move correctly. A drill removes the ball and the target so your only job is the one broken piece of the backswing. Fifteen focused, slow reps change a pattern faster than 100 full-speed swings. Build the move at home, then transfer it to structured golf driving range practice drills that test it under real conditions.
Common Backswing Mistakes to Avoid
Over-swinging for length. Past parallel, most amateurs lose lead-arm connection and drop the club off plane; a shorter, controlled turn is more repeatable.
Starting with the hands. Snatching the club inside with the wrists forces a reroute later. Move the club back with the chest and shoulders first.
Lifting instead of turning. Raising the arms without completing the shoulder turn creates a steep, disconnected top and a slice-prone downswing.
Rushing to full speed. Every drill starts at half speed or slower; old habits reappear the moment you swing hard before the new move is grooved.
A 3-Week Backswing Practice Plan
Week 1 — Isolate the fault. Pick the one drill matching your biggest miss and do 15 slow reps a day, four days, in a mirror or on camera, with no ball.
Week 2 — Add the ball, stay slow. Keep the same drill, then hit soft half-shots at 50 percent after every three or four reps, watching for the fault leaving your ball flight.
Week 3 — Build to full speed. Raise speed gradually, checking the drill feel holds, and finish each session tracking old fault versus fix. Once the backswing holds, transfer speed into the driver using how to hit a driver. If rhythm is your real miss rather than positions, spend that time on golf swing tempo drills, which train the roughly 3-to-1 backswing-to-downswing ratio far more precisely than any positional drill.
Frequently asked questions
Should backswing drills be done with or without a ball?+
Without a ball at first. A ball triggers the instinct to hit, which reintroduces the exact fault you are trying to remove. Groove the movement in slow motion in a mirror or on camera until it repeats, then add soft half-shots. Only take the move to full speed once it survives at 50 percent with a ball in the way. Most drills above start at quarter or half speed for that reason.
How far should the club go back in the backswing?+
For most amateurs, the shaft reaching parallel to the ground at the top is plenty, and many good players stop short of that. Length is not the goal. A shorter backswing with a full shoulder turn and a stable lead arm produces more control and often more speed than a long, over-swung position that collapses at the top and loses lead-arm connection.
How long until a backswing change becomes automatic?+
Plan on two to four weeks of short, focused sessions rather than one marathon. A new pattern has to survive the jump from slow-motion reps to full-speed swings under pressure, so build speed in stages. Most golfers who drill about 15 minutes a day, four days a week, see the new move hold up on the course inside a month, provided they keep filming to catch the fault returning.
How do I know which drill I actually need?+
Film before you drill. A ball that slices points to an open clubface and inside takeaway, so start with the takeaway and lead-wrist drills. Weight hanging on your front foot at the top is a reverse pivot; hips brushing past the line is a sway. Match the drill to what the camera shows rather than guessing, and only work one fault per session so you can tell what changed.
Can I do backswing drills at home without hitting balls?+
Yes, and it is often more effective. The mirror turn, one-piece takeaway, lead-arm connection, and lead-wrist drills all work in a living room with no ball and no club, or with a short iron and no swing at speed. Home reps remove the urge to hit and let you rehearse the shape slowly. Save the range for testing whether the new move survives full-speed swings and real targets.
Should I think about these drills while playing a round?+
No. Backswing drills belong in practice, not on the course. Running a checklist like connect the lead arm, load the trail hip mid-swing usually produces worse shots than trusting your swing. Do the conscious reps at home and on the range, then on the course pick one simple tempo thought and react. If rhythm is your real miss, train it with dedicated tempo work instead.
Sources
Play & tools
Free browser games and tools — no account, no download.
- Play today's Sports Connections — Today's Sports Connections — daily hints, answers, and play the grid.
- Play Guess the NFL Player — A new mystery NFL player every day. Eight guesses, with a clue on each — plus free unlimited mode.
- Explore all our games →
Related golf guides
View all →
8 Golf Takeaway Drills to Groove a One-Piece Start
The best golf takeaway drills ranked by fault-fixing payoff: the one-piece move, club-on-the-line, towel-under-arms, and the half-back checkpoint. Fix a whippy or inside start.
10 Alignment Stick Drills for Golf (Fix Aim, Path & Plane)
Ten alignment stick drills that fix golf's invisible faults—aim, swing path, and plane—using two cheap rods, each with a setup, a cue, and the exact miss it repairs.

9 Golf Downswing Drills to Fix Your Sequence and Path
Nine golf downswing drills ranked by how directly they fix the over-the-top move, weight shift, and lost lag — each with a cue and the exact fault it repairs.

8 Golf Early Extension Drills to Fix Your Posture and Ball-Striking
8 golf early extension drills ranked from fastest feedback to deepest rebuild. The chair, band, and squat-to-turn drills keep your hips back so you strike it flush.

8 Golf Grip Drills to Fix Your Hands and Stop the Slice
Eight golf grip drills ranked by the fault each one repairs, from a weak slice-causing grip to a death grip that kills speed. Fix your hands before you swing.

9 Golf Posture Drills to Fix Your Setup (With Simple Checkpoints)
Nine golf posture drills, ranked by leverage, that fix the tilt, spine angle, and hip hinge every swing depends on. Each drill has a one-second checkpoint.